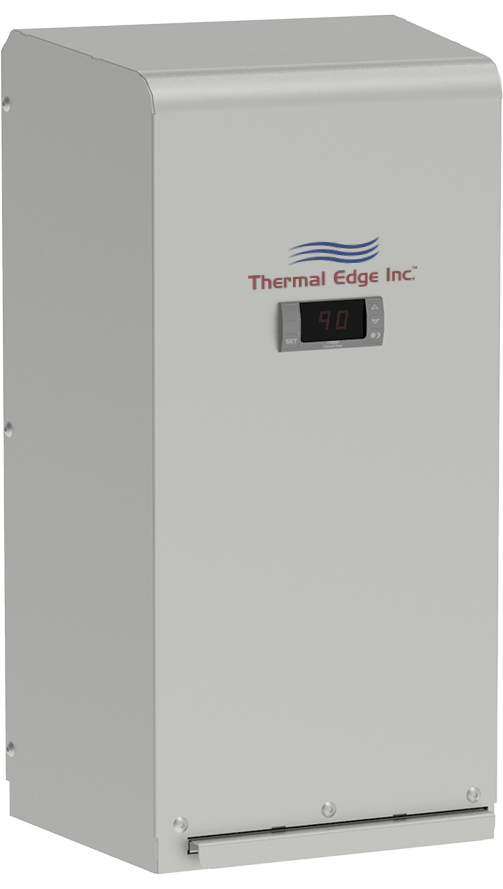
Digital Temperature Controller Programming
For the end user this section will provide all the necessary information to view and change all functions and parameters available to you.
HOW TO SEE THE SETPOINT
- Press and immediately release the SET key. The display will show the setpoint value.
- Press and immediately release the SET key or wait for 15 seconds to display the enclosure temperature again.
HOW TO CHANGE THE SETPOINT
- Press the SET key for more than 2 seconds to change the setpoint value.
- The value of the setpoint will be displayed and the “F” LED starts blinking.
- To change the SET value, press the UP or DOWN arrow key within 15 seconds. 4. To store the new setpoint value, press the SET key again or wait 15 seconds.
Note: The set value is stored even when the procedure is exited by waiting for the time-out to expire.
HOW TO ACCESS HIDDEN MENU 1
- Enter the Programming mode by pressing the SET + DOWN arrow keys simultaneously for 3 seconds. The “F” LED starts blinking.
- Select the required parameter by pressing the UP or DOWN arrow key. Press the SET key to display its value.
- Use the UP or DOWN arrow key to change its value.
- Press SET to store the new value and move to the following parameter. To exit: Press SET + UP arrow keys or wait 15 seconds without pressing a key.
Note: The set value is stored even when the procedure is exited by waiting for the time-out to expire.
HOW TO ACCESS HIDDEN MENU 2
- Enter the Programming mode by pressing the SET + DOWN arrow keys simultaneously for 3 seconds. The “F” LED starts blinking.
- Release the keys, then push the SET + DOWN arrows keys simultaneously, again for more than 7 seconds. The Pr2 label will be displayed immediately followed by the HY parameter.
- Select the required parameter by pressing the UP or DOWN arrow key. Press the SET key to display its value.
- Use the UP or DOWN arrow key to change its value.
- Press SET to store the new value and move to the following parameter. To exit: Press SET + UP arrow keys or wait 15 seconds without pressing a key.
Note: The set value is stored even when the procedure is exited by waiting for the time-out to expire.
HOW TO LOCK THE KEYPAD
- Press and hold the UP and DOWN arrow keys simultaneously for more than 3 seconds.
- The POF message will be displayed and the keyboard will be locked. At this point, it will be possible only to see the setpoint or the MAX or MIN temperature stored.
- If a key is pressed for more than 3 seconds the POF message will be displayed.
HOW TO UNLOCK THE KEYPAD
- Press and hold the UP + DOWN arrow keys simultaneously for more than 3 seconds until the Pon message is displayed.
Functions and Parameters
Function | Operation | Parameter | Menu Location | Factory Default | Operating Range | Unit |
Cooling Setpoint | Set Desired Cooling Temperature | SET | Main | 90 | 70 – 95 | °F |
Cooling Differential | Control Hysteresis | Hy | Hidden Menu 1 | 5 | 1 – 45 | °F |
Compressor Protection | Anti short-cycle delay | AC | Hidden Menu 2 | 5 | 0 – 50 | min |
Probed Displayed | Select Display Probe P1 – Enclosure Temperature P2 – Condenser Temperature |
Lod | Hidden Menu 2 | P1 | P1 / P2 | N/A |
Auxiliary Setpoint | Setpoint for Dry Contact *1 / Heater | SAA | Hidden Menu 2 | 105 / 55 | -67 – 302 | °F |
Function | Operation | Parameter | Menu Location | Factory Default | Operating Range | Unit |
Auxiliary Differential | Heater or Dry Contact Hysteresis *1 | Shy | Hidden Menu 2 | 3 | 1 – 45 | °F |
Maximum Temperature Alarm | Alerts with “HA” when maximum temperature has been exceeded | ALU | Hidden Menu 2 | 105 | 45 – 302 | °F |
Minimum Temperature Alarm | Alerts with “LA” when minimum temperature has been exceeded | ALL | Hidden Menu 2 | 45 | -67 – 105 | °F |
*1 Note: When both Heater and Dry Contact options are included, these parameters only control Heater Settings. Dry Contact is controlled by ALU.
Alarms Signals
Message | Cause | Outputs |
“P1” | Enclosure Probe Failure | Start and stop of the compressor after 15 minute intervals *2 |
“P2” | Condenser Probe Failure | No Output *2 |
“HA” | Maximum Temperature Alarm: P1 > 105°F for 3 minutes (after initial 30 min. start up delay) | No Output *2 |
“LA” | Minimum Temperature Alarm: P1 < 45°F for 3 minutes (after initial 30 min. start up delay) | No Output *2 |
“HA2” | Condenser High Temperature Alarm: P2 > 145°F for 3 minutes | Compressor Off *2 |
“LA2” | Condenser Low Temperature Alarm: P2 < 50°F for 3 minutes | No Output *2 |
“CA” | Evaporator Coil Alarm: Low Pressure for 3 minutes | Compressor Off *2 |
“noP” | Invalid Probe Selected: Low Evaporator Coil | No Output, Display Only |
*2 Note: When both Heater and Dry Contact options are included, Dry Contact (Alarm Contact) Relay is activated.
ALARM RECOVERY
If the compressor is turned off due to an alarm, it will be able to restart after the AC anti short-cycle time delay. (Parameter AC = 5minutes)
Probe alarm P1 is cleared with no time delay after the fault is cleared.
Probe alarm P2 starts and stops with no time delay.
Temperature alarm HA automatically clears as soon as the temperature returns to below 105°F (the ALU setpoint) -2°F = 103°F.
Temperature alarm LA automatically clears as soon as the temperature returns to above 55°F (the ALL setpoint) +2°F = 47°F.
Temperature alarm HA2 automatically clears as soon as the condenser coils temperature returns to below 135°F.
Temperature alarm LA2 automatically clears as soon as the condenser coils temperature returns to above 60°F.
Temperature alarm CA automatically clears as soon as the pressure returns to normal.